
iOS 라이브러리 제작기
iOS에서의 의존성 관리도구
현재 iOS 애플리케이션 개발 환경에서 쓰여지는 의존성 관리도구는 아래 3가지 정도가 있다.
- Cocoapods(코코아팟)
- Carthage(카르타고)
- Swift Package Manager(스위프트 패키지 매니저)
코코아팟 라이브러리 제작
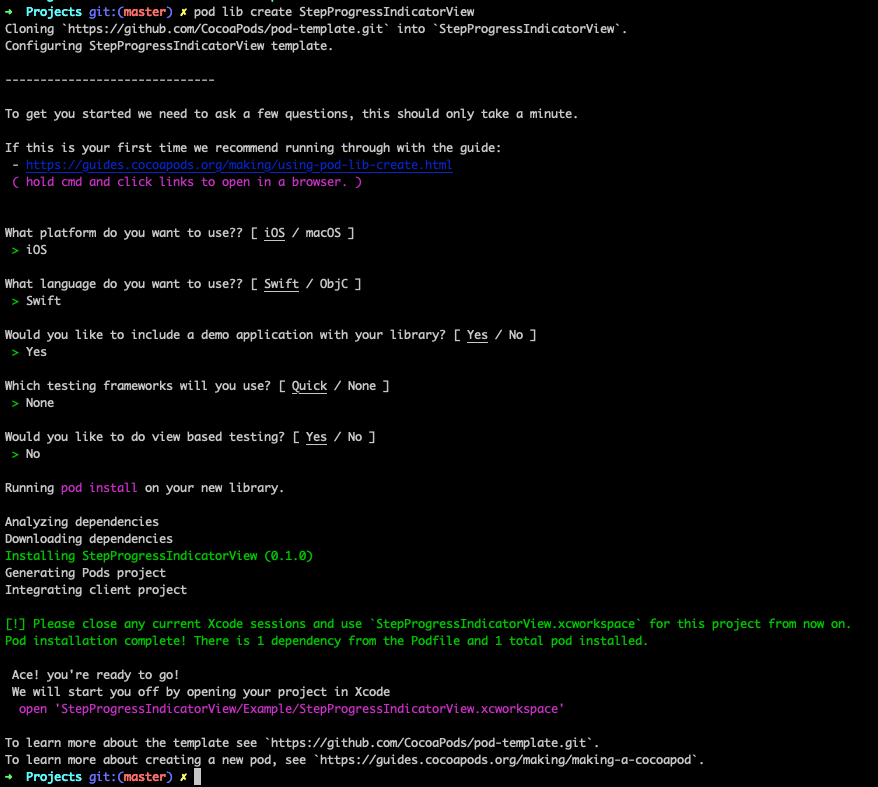
코코아팟 프로젝트 생성
pod lib create StepProgressIndicatorView
원하는 디렉토리 안에서 pod lib create {라이브러리명} 명령어를 실행한다.
프로젝트 설정
프로젝트 생성에 앞서 플랫폼, 언어, 데모 앱 포함 여부, 테스팅 프레임워크에 대한 설정을 적용할 수 있다.
.Podspec 설정
코코아팟 프로젝트 생성 이후, 동일 경로에 {라이브러리명}.podspec 파일이 함께 생성된다. .podspec 파일은 라이브러리에 대한 정보를 담고 있다. 빌드 설정, 이름, 버전, 라이브러리에 대한 설명 등의 메타데이터가 포함된다.
Pod::Spec.new do |s|
  s.name             = 'StepProgressIndicatorView' // 라이브러리 이름
  s.version          = '1.0.0' // 배포 버전
  s.summary          = 'iOS Library for building step progress indicator view' // 설명

# This description is used to generate tags and improve search results.
#   * Think: What does it do? Why did you write it? What is the focus?
#   * Try to keep it short, snappy and to the point.
#   * Write the description between the DESC delimiters below.
#   * Finally, don't worry about the indent, CocoaPods strips it!

  s.description      = <<-DESC
TODO: Add long description of the pod here.
                       DESC

  s.homepage         = 'https://github.com/miiiiiin/StepProgressIndicatorView'
  # s.screenshots     = 'www.example.com/screenshots_1', 'www.example.com/screenshots_2'
  s.license          = { :type => 'MIT', :file => 'LICENSE' }
  s.author           = { 'miiiiiin' => 'min.songkyung@gmail.com' }
  s.source           = { :git => 'https://github.com/miiiiiin/StepProgressIndicatorView.git', :tag => s.version.to_s }
  # s.social_media_url = 'https://twitter.com/<TWITTER_USERNAME>'
  s.swift_versions = ['4.2', '5.0']
  s.platform       = :ios, "13.0"
  s.ios.deployment_target = '13.0'

  s.source_files = 'StepProgressIndicatorView/Classes/**/*' // 소스 파일이 위치한 디렉토리 주소
  s.frameworks = 'UIKit' //사용한 프레임워크

  # s.resource_bundles = {
  #   'StepProgressIndicatorView' => ['StepProgressIndicatorView/Assets/*.png']
  # }

  # s.public_header_files = 'Pod/Classes/**/*.h'
  # s.frameworks = 'UIKit', 'MapKit'
  # s.dependency 'AFNetworking', '~> 2.3'
end
라이브러리 배포 (CocoaPods)
Github 저장소 생성
- Github에 접속하여 새로운 레포지토리를 생성한다.
- 로컬에 있는 라이브러리 소스를 GIthub 원격 저장소에 업로드한다.
git remote add origin
git push -u origin main
Git 업로드가 완료되면 아래 화면과 같이 라이브러리 코드들이 원격 저장소에 올라간 모습을 볼 수 있다.

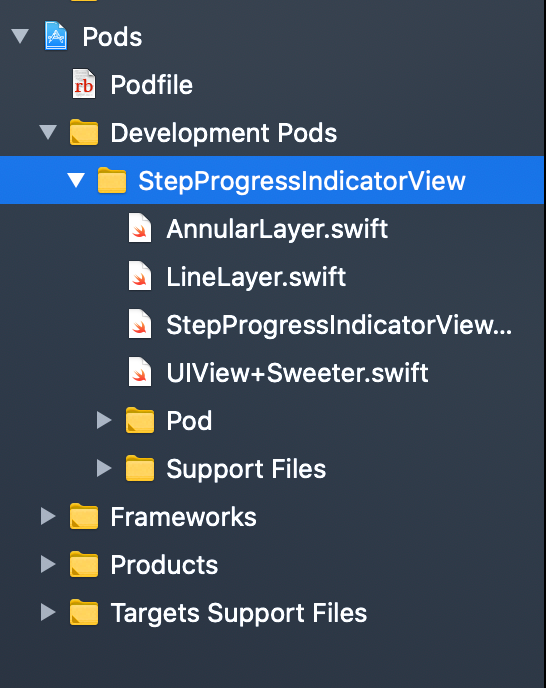
라이브러리 코드 작성
StepProgressIndicatorView 폴더 하위의 ReplaceMe.swift 에 대체하여 작성.
Classes 폴더 하위에 원하는대로 생성 및 수정 가능. (단, 디렉토리 구조 변경 시 .podspec에 변경한 경로를 명시해주어야 함.)

.Podspec 검증
pod spec lint
다음 명령어를 실행하여 해당 라이브러리의 .podspec 파일에 이상이 없는지 확인한다.
해당 명령어를 통해 .podspec 파일에 명시된 값들에 대한 유효성 검증이 진행된다.
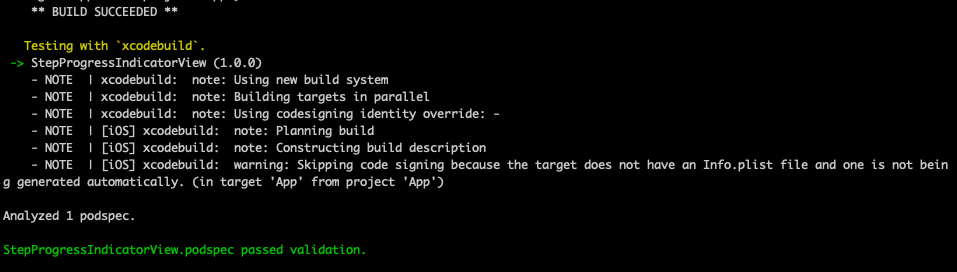
유효성 검증이 완료된 상태이다.
코코아팟에 계정 등록
pod trunk register {이메일} {이름}
다음 명령어를 실행하면 해당 이메일 주소로 인증 메일을 받게 된다.
코코아팟 배포
‘pod spec lint’ 명령어를 통해 검증이 완료되면 아래 명령어를 실행하여 코코아팟 라이브러리 배포를 진행한다.
pod trunk push {라이브러리명}.podspec
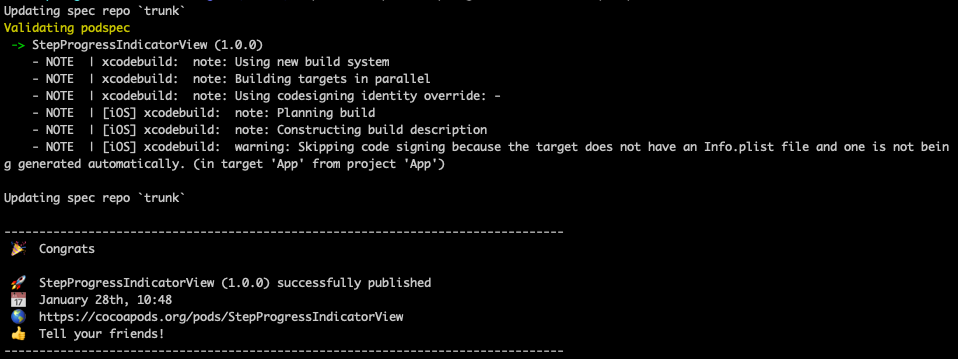
배포가 완료된 상태의 터미널 화면이다.
해당 레포지토리 페이지를 새로고침하면 pod, platform 뱃지가 활성화된 것을 확인할 수 있다.

해당 레포지토리 페이지를 새로고침하면 pod, platform 뱃지가 활성화된 것을 확인할 수 있다.
라이브러리 호출
라이브러리 추가
타 프로젝트에서 라이브러리를 추가하여 사용하려면 가장 먼저 CocoaPod이 초기화되어야 한다.
코코아팟 초기화
pod init
프로젝트 디렉토리에서 다음 명령어를 실행하면 Podfile이 생성된다.
코코아팟 설치
Podfile에 사용하고자 하는 라이브러리를 추가해준다.
Podfile에 사용할 라이브러리를 추가해주고 다음 명령어를 통해 설치를 진행한다.
pod install
프로젝트 내 추가
import {라이브러리명}
프로젝트 내에서 설치된 코코아팟 라이브러리를 사용하려면 Swift 파일 상단에 해당 라이브러리를 임포트해주면 된다.
import StepProgressIndicatorView

let stepIndicatorView = StepProgressIndicatorView(frame: self.view.bounds)
stepIndicatorView.stepTitles = ["One", "Two", "Three", "Four"]
stepIndicatorView.details = [0: "First", 1: "Second"]
stepIndicatorView.direction = .topToBottom // set direction leftToRight, topToBottom ...
stepIndicatorView.currentStep = 0 // s
함수
// Update Sub Layers
override public func layoutSubviews() {
    super.layoutSubviews()
    self.updateSubLayers()
}
View
@IBDesignable
public class StepProgressIndicatorView: UIView { ... }

//상속
class CustomStepView: StepProgressIndicatorView { ... }
ViewController
class ViewController: YYSimpleViewController {

  YYSimpleAlert(title: "Simple Alert Check", confirm: "Yes") {
      print("So Simple Alert")
      let viewItem = self.items.first
      let controller = YYSimpleDetailViewController(item: viewItem!)
      self.navigationController?.pushViewController(controller, animated: true)
  }.show(in: view)

}
CocoaPods 의존성 추가
Dependency
타 라이브러리의 의존성을 추가해서 사용할 수도 있다.
.podspec 에서 의존성을 추가하고 싶은 pod의 이름을 기입한다.
s.dependency 'GoogleSignIn'Pod::Spec.new do |s|
s.name = 'StepProgressIndicatorView' // 라이브러리 이름
s.version = '1.0.0' // 배포 버전
s.summary = 'iOS Library for building step progress indicator view' // 설명
# This description is used to generate tags and improve search results.
# * Think: What does it do? Why did you write it? What is the focus?
# * Try to keep it short, snappy and to the point.
# * Write the description between the DESC delimiters below.
# * Finally, don't worry about the indent, CocoaPods strips it!
s.description = <<-DESC
TODO: Add long description of the pod here.
DESC
s.homepage = 'https://github.com/miiiiiin/StepProgressIndicatorView'
# s.screenshots = 'www.example.com/screenshots_1', 'www.example.com/screenshots_2'
s.license = { :type => 'MIT', :file => 'LICENSE' }
s.author = { 'miiiiiin' => 'min.songkyung@gmail.com' }
s.source = { :git => 'https://github.com/miiiiiin/StepProgressIndicatorView.git', :tag => s.version.to_s }
# s.social_media_url = 'https://twitter.com/<TWITTER_USERNAME>'
s.swift_versions = ['4.2', '5.0']
s.platform = :ios, "13.0"
s.ios.deployment_target = '13.0'
s.source_files = 'StepProgressIndicatorView/Classes/**/*' // 소스 파일이 위치한 디렉토리 주소
s.frameworks = 'UIKit' //사용한 프레임워크
s.dependency 'GoogleSignIn' // 의존성 추가할 팟 라이브러리
end
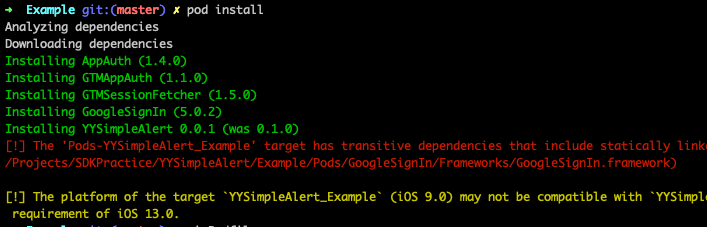
.pospec에 의존성을 추가한 뒤 터미널에서 pod install을 실행하면 해당 라이브러리를 설치할 수 있다.
그런데 pod 설치 결과를 보니 해당 프로젝트 타겟의 의존성이 정적링크를 포함하고 있다는 에러 메시지가 뜬다.
다시 .podspec 파일을 열어 다음 속성을 추가해준다.
코코아팟 1.4.0부터 추가된 podspec 속성으로 동적 프레임워크 대신 정적 프로그램으로 빌드하게끔 지시한다.
s.static_framework = true
pod을 deintergrate하고 다시 install하면 다음과 같이 깔끔하게 설치된 결과를 볼 수 있다.
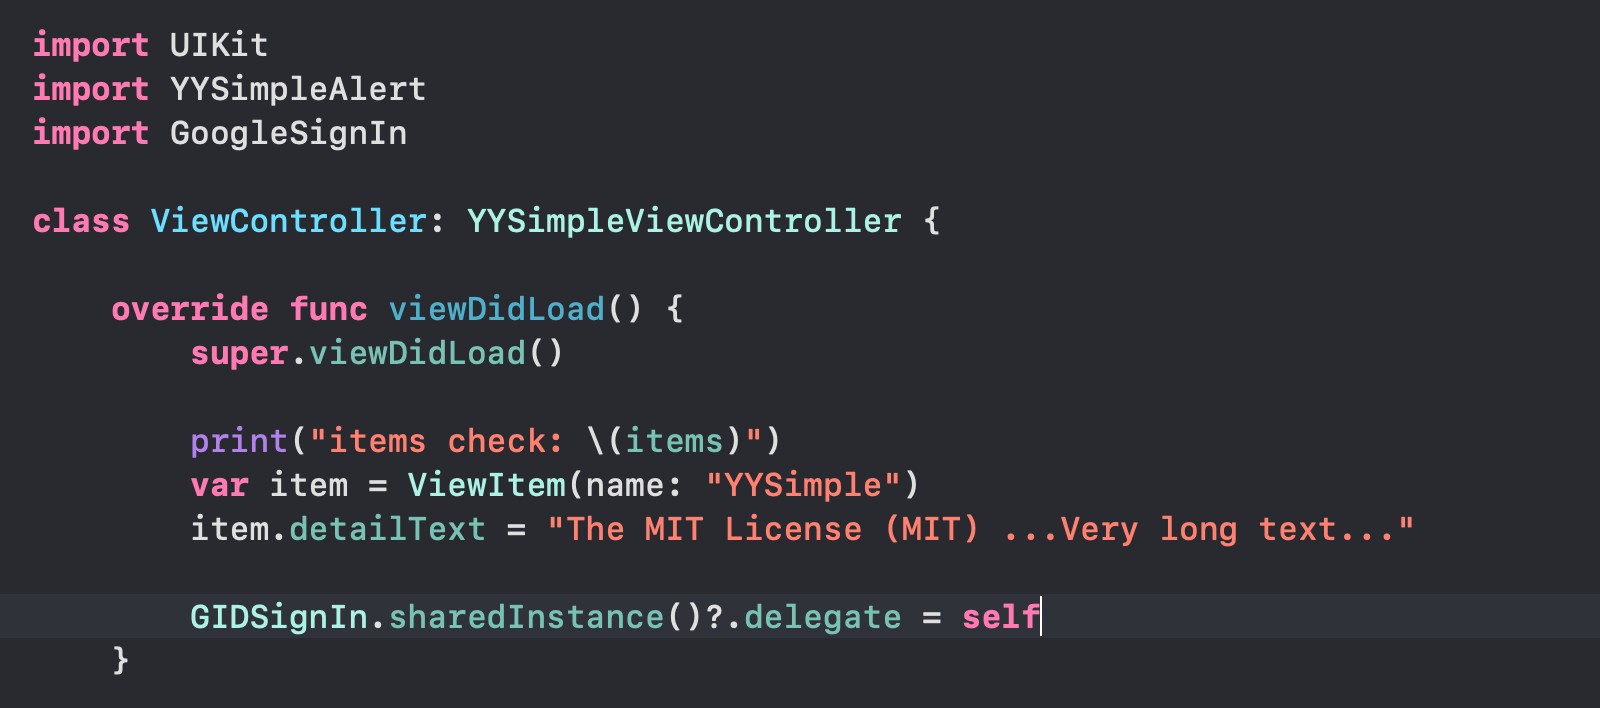
- Example 프로젝트에 적용한 결과
외부 라이브러리를 함께 임포트해서 사용할 수 있다.
프레임워크 연동
s.vendored_frameworks = '{프레임워크명}.framework'프래임워크를 가져와 팟에 연동시켜준다.
'iOS' 카테고리의 다른 글
| AWS S3에 이미지 업로드 하기 (0) | 2022.03.25 |
|---|---|
| Apple Enterprise 와 Apple Business Manager (0) | 2021.10.20 |
| iOS Framework 만들어보기 (0) | 2021.07.10 |
| 스위프트 패키지 매니저(Swift Package Manager) 라이브러리 만들기 (0) | 2021.07.09 |
| UICollectionView에 대해 알아보자(1) (2) | 2020.11.08 |